Welcome at FreeTime Toys

Hello everybody and welcome here. This blog will be dedicated to the few toys projects I will do during my free time. You can expect some toys rehab, some design adaptation and some brand new design.

If you are here you probably know my taste for Jumbo Machinder, so most of my projects are related to those big guys. Hope you will enjoy it.

Friday, August 9, 2013

Gold is a HUGE pain

I was maybe happy too early with the second version of gold. When I've check it in the morning with day light, it was more like a bronze color. I've clearly add  too much red to the gold and the result was not that great.

After a day at work, thinking of it and how not accurate that was, I decided to go for a third attempt on the gold. But this time with more testing before going with the airbrush.

After a few attempt I've manage to get something more close to the original, more yellow gold. So I've decide to go for it. The result is kind of ok, but I've probably add to much colors to the gold to get something more close and it has remove a bit of the metalic look of the gold paint. So it's more like a metalic mustard color now, but it looks good enough.

Now, I need to finalize that launcher but that will be for after my holidays. Now it's time for a cool break and some rest.

So here's a few pictures of the paint. The first one is with the bronze look.


And that one is with the last gold attempt, the pict is a bit too saturated but it's more or less like this now.


It's way more accurate when I compare it with the image reference I have of it, and the mix of colors is more balanced.

And here's another pict with other light conditions. I really need to do more pictures of it but that will have to wait a bit.


Tuesday, August 6, 2013

Gold is a pain

Painting is done, but it was not that easy. Well, yes it was, but the gold was really different once painted. It looked nice inside the bottle and the color reference was nice also, but when it was painted it was more "champagne gold" that usual gold. And of course since I'm doing the paint in the basement with not a good light condition, it was only visible in day light. Everything looks warmer down there.

So I've add a bit of red and a tiny bit of yellow to kill that champagne look and I've redo the whole gold paint. And the result is reallu how it should have been in the first place.

I just have to put the semi gloss varnish on all the pieces and it will be done. And of course a bit of work on the launcher mechanism.

So here's a quick pict with poor lights but just to have a sneak peak of the head paint.


The red and the blue are super flat for the moment, but after the varnish it will have the perfect look. Hope that it doesn't rain tomorrow morning so I can do this before going to work.

Monday, August 5, 2013

Quick update

YEEESSS the sanding is done.

Well, this time it was easier as there's a lot of area that doesn't really require sanding as the idea is to keep the grain.
I had some time this morning to put the primer coat and it actually looks pretty cool. It's the first time I use a primer on my big replicas because it's so sanded that the surface is more than ready for paint. Since it's not the case, I wanted to be sure and put a primer on it.

It's fun to see it like that as my modeling previews are also in gray, so it's probably the closest he will look to that.

Now it's time to play with the airbrush and see how it goes. I'm a bit in a rush as I want to have it finish by the end of the week so, every little hour here and there is nice.

Here's some picts with the primer.


I wanted to share those as it's easier to see the volume of the sculpt as now it's of course less translucent. The 3D print quality is really amazing.


And here's a little extra. I've work on the stickers for the eyes and I've make a quick version to print with lots of eyes with little variations so that after it's printed, I can choose which one looks the best. This image iteself is pretty nice, some kind of mix between Verner Panton and Vasarely.

Friday, July 26, 2013

Lenzari finally there

Yes, he's finally here. After hours and hours of work on the modeling and finding a way to print the grainy surface, Lenzari is here. I was sooooo anxious about the print. Even if the test came out great, there's always a chance that it's not printing properly again. And there was a few hard decision to make regarding print orientation and the chances that it's coming out weird.

And before talking about this guy, I still don't know how to spell it properly. I think that normally it's Lensari, because his name comes from Ari in Japaneese for Ant and Lens for his lens shaped eyes. But I honnestly prefer to write it Lenzari because it looks better. I love to have a Z in a word hahahahahaha.

Well, the final result is really nice and once again I have to thank all the team at i.materialise for all their effort and the quality they continue to level up each time.

What's interesting is that I was afraid of the grain surface but actually that's what came out the best. Almost no need of post process on those parts.

Enough talking, here's a few picts of it.


 The choice of orientation I was talking before was mainly on the body. When you 3D print something with almost all printer, there's visible print layers. If the body was printed in a vertical position, with the curve of the shoulders there might have been little print layers on the shoulders and it would have been almost impossible to remove them. I would have to sand it and this would remove all that grain for which I've spend so many hours to get properly. The idea was to print in standing on the side. This way, the tiny print layers are on the left and on the right under the arms on the character.


 On this picture you can see on the right side of the body, sime little pegs. Those are the remaining parts of the support structure.
During the print process, the parts are not self supported, so there's some kind of support structure build around the piece to support the weight and it's connected to the piece with little pegs like this. I was afraid that too much structure will be needed for this print. But it turns out that not so much was necessary. That's really the good news of the day.


You can see how detailed is the print here for the grain surface. And as you can see there's also the little pegs under the head as this parts was printed vertically. One of the stupid thing that really excite me with that project is that there's stickers for the eyes. Until now, all my villains were fully painted and no stickers at all. But for that one, the final touch will the the stickers for the eyes.

One of the little detail that I'm not really happy is the lines on the arms. Actually it's not as deep as the one on the legs and on the head. It could have been a tiny bit deeper. Hope that after sanding the arms it will still look good. As it might be even less deep after sanding the arms to be perfectly smooth.

Here's more picts of this bad guy.


Next step will be the ultra boring sanding process. But the good news is that there's a lot of grain surface on it that doesn't require sanding. So it will be mainly the legs and arms and of course his amazing launcher. For that one I still need to figure out how to make the metalic cover but I have some ideas somewhere in my head.

And for that one, I've decided to paint it myself. It's one of the fun part of the process and I was a bit sad to let it go for my Garada and for the Green Ghost. So this time I will keep some fun for me. Just hope I will be able to do it perfectly. But it souldn't be that hard. My airbrush skills might be more than enough for it.

Thanks for reading and stay tune for the next step.

Tuesday, June 25, 2013

Test print side by side

This is another chapter in my quest for the perfect Lenzari replica.

So, after trying to do the grainy surface on the 3D model I had to test it with a 3D printer to see how it will come out.
I was not really sure about all this and if the printer I've use in the past for the big size stuff will have enough resolution to print that grain.

After a few exchanges with the great support team of i.materialise, I wanted to test two printers: their regular SLA printer and the Connex from Objet.

On paper the Objet is really more accurate and seems to be a good choice. But this service is only available with the Vero White material of the Objet printer. Since I had some good results in the past with my mini vilains I wanted to try it also for this test.

The only problem thing that I was afraid and who might stop me is that I can't sand my pieces to get them perfectly smooth since the idea is to have a grain and if I sand them, it's going to remove the grain.

Here's a few images of the raw prints.

Those first images are from the Objet printer and as you can see it's really hard to judge the level of detail. It's actually one of the problem for me of this material, the light is really passing trough and it's hard to see the surface quality.


As you can see it's just one small part of the body but it's enough for this test and already quite expensive.

This second serie of images is from their SLA printer with the material called "paintable resin". As you can see, the surface looks pretty nice and regular and the grain is visible and the print layers not that much.


It's also a bit hard to judge the print quality so the best way to check all this was to put a primer coat on both test pieces.

I wanted to be sure that the primer will stick perfectly so I decided to sand each piece smoothly with a 600 grid sand paper. Just to prepare a tiny bit the surface. And I've also do a quick sanding with a 1200 grid.
IAfter that, I've put two coats of primer and here's the result:


The Objet print is on the left and the print layers are highly visible, the surface quality is far from perfect. And on the right, it's the SLA print, almost the challenger for me on that one and the result is really nice. The print layers are almost invisble, the grain comes out great.
There's no comparaison possible here, it's a total no match.
And as you can see, the primer is really going well on the surface, so the "paintable resin" is really the perfect name for this material.

Here's other close up pictures of each pieces.


 It was really a good plan to make this test as I was able also to see how my grain will come out and that I needed to refine it a bit to be more close to the original. The level of details is really nice and I'm sure that I can have something that will look close enough to the original.

Now I need to finalize all the model with the new grain, I've also decide to add some grain on the knees and elbows parts as it seems that there's a tiny bit there also.
And also a very big check on all the connections parts as the modeling of the grain tends to shift a bit the whole surface.

That's a bit it for today's post. A bit technical but it's good to have some behind the scene stuff like this also.


Wednesday, May 29, 2013

To print or not to print

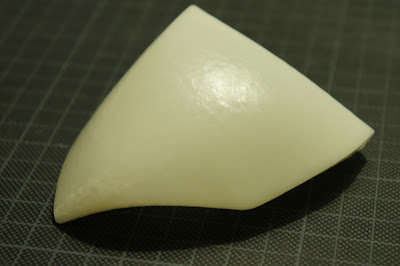
People who know the Lensari Jumbo Villains, know that his surface is not smooth. The body is actualy with some kind of grain texture on it and some parts of the head also.

To get the same kind of effect, I'm hesitating between two different techniques. The first one would be to print all the parts as smooth as possible, and then cover them with putty and sculpt the grainy surface on it. Maybe with some kind of rocks who have the same texture, by pressing smoothly on the putty.

The other option is to try to 3D print it directly with that grainy surface. Well, that kind of grain is probably too small for the level of detail of most of the printers out there. But I've decide to try it. Not on the whole surface of course, but to print a tiny part with that grain surface.

But before doing this, I had to figure out how to do this grain surface on my 3D model. After a few hours on another 3D modeling software, I was able to get a decent result. The downside of this is that you really need to have a super high level of detail in your mesh to get a clean result. So my model is now close to 20.000.000 polygons. That's probably the highest I've ever make for a single character. I think that the smooth version have 10 times less polys.

So here's an image of this quick modeling test. I'm planning to print the half of the upper body part for the test. Could be interesting to see how it manage to print the grain on the almost horizontal surface.


And of course depending on this test, I will see which option I choose. I'm really curious to see how it will come out.

Thursday, April 11, 2013

RokuronQ9 Final Model

So, after long hours of adjustments and tweaking, here's the final model of the revised version of Rokuron Q9. I have to say that I'm pretty happy with this version as I've had some frustrations with the first replica like I've explain before.

The first one was a good opportunity to test the technique and see how I can work with that. It actually opened lots of perspectives and ideas so it's cool. But I wanted to have something more close. Like for Garada, trying to capture the soul of the original toy and what is fascinating about it was a good challenge.

There's maybe a few things here and there that I will improve and of course I will have to make all the usual technical modeling before launching any 3D print. And all this will probably wait a bit as it's time to go back on Lenzari and finish that part for him.

So here's the images of the Rokuron. I will probably try some more because it seems that the lens I use distort the one on the side a bit too much, so might have to adjust that. They look a bit weird to me for the moment.


Sunday, March 31, 2013

Rokuron Q9 Version 2.0

When I did my first big replica, I got some help of a really talented 3D modeler because I was a bit rusty with my modeling skills back then.
The result was really nice but overall the model was not really accurate. It's a bit my fault as I should have maybe spend more time checking everything and comparing with the original.

Well, I was really happy anyway since the result was beyond my expectations, but since I've done other replica now and they're a bit more accurate I decided to see what I can do with Rokuron to have it a bit better.

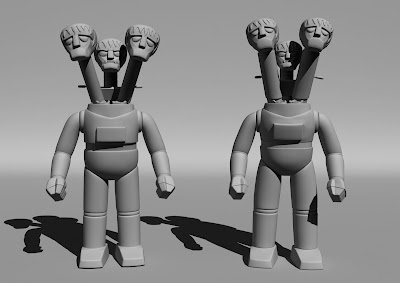
So here's a few image of the early modeling test. I've mainly  work on the heads, the body and the legs for the moment. But it already gives a good idea and it looks already much better.


One of the things that disturbed me a lot with the first one I did was the jaws, they were pointing a bit forward but on the original it actually backward. I think that I'm more or less there with the heads now.


Still a lot of things to adjust, the body is really far from perfect for the moment as the model is really with lots of faces, so maybe I will have to clean it a bit or spend lots of time on it to have it perfect.

Wednesday, March 27, 2013

Lenzari update

Things are moving slow due to a lot happening in my life. So, not much time to work on my little projects. But still I've been able to go back on the Lenzari modeling and here's a few images of the modeling in progress.

A few details have been improved since last time on the visible modeling. Adjusting a few proportions and details. But I've mainly spend my time working on the technical modeling of it. Making the wall tickness and the connections between the different parts.
The main difference on that one compare to Garada and Green Ghost is that he don't have a separate pelvis and the head is separate from the body. I've use more or less the same technique to connect the arms, except that this time the little pegs are on the arms and not the body. And I've also  use the same stuff for the head and the hand with the gigantic missile launcher. This way I don't need to glue them and they will be a bit articulated.

For the legs I've use a simple connection as I'm planning to glue them, it's way better for stability and since the connection is 45% almost, it's a bit silly if you bend them anyway.


I still have to finalize the wall thickness on the head and connect all the pieces together properly as for the moment there's a lot of different parts just put like that together. Will have to clean that so it will print perfectly.

One of the things that I need to focus know is also the grainy surface of the body and some parts of the head. I'm pretty sure that it's impossible to get something like that with the 3D printer, mainly because of the print layers and how to clean them after. I will probably make a quick print test to be sure. But for the moment the idea is to print it smooth and put a thin layer of magic sculpt on it and create the grainy surface like that. It looks like a good plan but I will have to test that as well. And that's for next time.

Friday, February 8, 2013

This Is SPARTAAAAAN!!!!!!!!!!

Finally finish the restoration of my Spartan. Well not completely since I've decide to skip the launcher for the moment. But it's ok for the shield and for the spear.

So let's have lots of pictures just for our pleasure.

These first picture show my restored Spartan next to the one of my friend who was super kind to let me have it for some weeks to cast the shield and check the launcher.
The one on the left is his and the one on the right is mine.


As you can see there's a slight difference in color, but what's kind of funny is that in real, the original looks a bit made of a warmer grey, and here on the picts it's the opposite.
It's really impressive to see two Spartan next to each other. I've search for one a long time and it's a nice reward to see this.

On this next picture it's the back of the shield. As you can see, my reroduced shield is a bit loose compare to the original who stays firmly in place. That's mainly because I had to make the hole big enough to pass it on the fist. I might secure it a bit more with some double face tape but for the moment it display nicely and it's all that matters for the moment.


You can also see the the back surface of mine is slightly more rounded on the edges than the original. That's because I wasn't able to make a mold of the back surface and that's also why it's smoother at the connection. The little round in the middle was the part that I've 3D print and glue on the back of my "master shield" before creating the new mold.


So, here's some other pictures, the first one is the one I've receive from the previous owner, so you can see how it looks without the shield. I'm soo happy that he agreed to sell it to me.
His Spartan found a new life here for sure, and he's ready to join the fight again.


And that's him today, as you can see, the fact that launcher is broken and missing the back part is not a big deal as it can be displayed with the spear in it and it looks pretty good like that.


And to conclude this news and this project, here's an image of a few pieces.
The white shield is my "master shield", the darker grey is a first test to see how the color can look and also to test the metalic powder I needed to add in the resin to have the same metalic look as the original shield. It actually worked really well, but that first test was too dark. Then you have the back and the front of two shields freshly casted. As you can see it's hollow like the original one. Would have been crazy to try to make it plain, too heavy for his arm for sure. And making it hollow doesn't require lots of resin to cast, and that's just great.
And on the side, there's the final spear with the right color formula and the varnish coat to have the perfect look and feel.


I guess that now that one is finish, I will take some rest and go back on the Lenzari project, still a lot of work on that one before it's going to be ready for 3D printing.
Hope you've enjoy this project, more traditionnal and old school in the technique but it's good to go back to the basics from time to time.

Wednesday, February 6, 2013

Change of plan

After lots and lots of thinking about the mold for the shield, I've decide to go with a wiser solution.

I wanted to save a bit some money on the mold by using the front mold I did from the original shield, and create the bottom part for it. But it was really not safe as I had to remove the shield at some point and put in back in the mold before creating the second part. I've try to put the shield back but there was some tiny gaps and the new silicone might have flow between the first mold and the shield, with a lot of chances to ruin the first mold.

The wiser choice was to prepare a super clean "master piece" with the shield. To do that, I've cast the front part in my first mold, rotating it so that the front part is hollow. I've then create a circle part to put higher in the shield and cover the remaining part with resin so that that master is hollow to save some resin. I've fine tune the back surface and glue the little connection piece that I've 3D print.

Then I've cast a new mold in two piece from that "master shield". Here's the picture of the mold, ready for casting. Can't wait to be tomorrow to test it and see how it goes. Might have to cast a few before getting one perfect but I've learn a lot about the new resin I'm using whil casting the spears.


Hope to be able to show you the final restoration soon. I still have to finalize a new launcher for my Spartan but it's really not my priority for the moment as he's got the front half of the original one and it displays really well like that. Beside, if I want to display it with the spear in the launcher in my display case, it's almost impossible as it's super deep because of the lenght of the spear and the trigger mechanism. But I guess that I will do it in the weeks to come just to have it complete.

Tuesday, January 29, 2013

Lots of spears

Here's a little work in progress with the Spartan's spear. After a good cleaning of the 3D print I've make a mold of the spear and do a few cast tests for the colors.

When I look at this, I still have so much to learn with mold making. The silicone is really accurate even for the surface finish. The 3D print was clean and smooth but not super smooth, still had a flat finish as I didn't end it with a super mega fine grid like a 2000 or something like that. And I didn't paint it before doing the molds.

So the result is cool but when it comes out of the mold if has the same flat finish as the 3D print. And instead of redo the whole mold after a better finish on the printed spear, I've decide to try to put a little coat of semi gloss varnish to see how it looks and it's actually perfect. Ok I'm a bit lazy on that but the result is nice once the varnish is there.

Here's pict with the first color and resin test:


I've test two kind of resin, one made for rotational casting (yes those are hollow like the originals) and one made for color effect.
The one for rotational casting gives clearly a better and more consistency result for the shape and thickness. But when it cures it turns white, so you have to put a lot more color and make it really dark in order to have something in a medium color look. So it's a bit a pain to figure out how it will look once you demold it.
The other one, made for colored casting works really well with the colors and what you prepare before pouring really comes out like that at the end, but it's slightly less consistent in the thickness of the spear. I will go with that one as for the moment and after some more test I've manage to get the right color formula, mixing yellow, red, white and brown colors into the resin in various amount.

The one in the middle is slightly more glossy as it's one with the varnish and with the right color mix.

For the shield, no picture today, but I've manage to have a good "master shield" after casting the front part in my mold and build a rear part with resin and a little 3D print of the connection part. Now I need to do a new mold for that and it will be ready to cast.
I'm hesitating about trying to put my "master shield" back in the first mold and cast the second half on top of this but I might have a strange seem in the back. So the wiser choice would be to redo a clean and new mold from that "master shield"

Will keep you posted when it's done with some pictures of the whole Spartan with his new weapons.

Wednesday, January 9, 2013

Happy New Spear

First  I would like to wish a Happy New Year to everybody reading my little blog.
Wish you all the best for this year, good health for you and your family and good moments with the people you care about.

To start this year, here's the 3D print of the Spartan spear I've just receive today. This was started a long time ago, before I even had a Spartan as I was sure that if I find one it will miss the spear as usual with this villain. And it's the case so I've finalize the model and launch the print.

I wanted to test the Prime Gray from i.materialise for a long time now and this was a good opportunity. It's a bit cheaper than what I use for my big replicas but it's actually the same technique and since I paint all my stuff, it's interesting because it's the same resolution, same material, just the color that is gray and it's cheaper. Good deal I guess.

So here's the image of this spear, raw from the printer and ready to be sanded. I'm not going to paint that one this time but I'm going to use it to make a mold and cast it in brown resin and hollow, so it's going to be closer to the original this way.


What's interesting also with this material is that it's easier to see the print layer. The white resin I've use until now is a bit translucent, and then it's really hard to see the print layers when you are sanding it an after it's sanded. You really have to turn the object in the light to see the remaining print layers. Here it's way more easy to spot and then more easy to clean and sand.