Welcome at FreeTime Toys

Hello everybody and welcome here. This blog will be dedicated to the few toys projects I will do during my free time. You can expect some toys rehab, some design adaptation and some brand new design.

If you are here you probably know my taste for Jumbo Machinder, so most of my projects are related to those big guys. Hope you will enjoy it.

Sunday, November 27, 2011

Garada's Revenge

What if the good guys turned out to be the bad guys, what if the vilains were actually the heroes... Imagine a world with Garada K7 being the star of the show. Probably the commercial for the toy line in the 70's would have look like this:


So for all of you who suffered from seeing this Jumbo Mazinger commercial with our favorite vilain exploding, well it was time for him to take his revenge. Payback Time mouahahahahahahahahahaha......

This is a little something I've been working on the past few days, each time I was watching the original commercial it was too hard for me, so I decided to do this little thing to balance my pain, kind of a little therapy.

Wednesday, November 9, 2011

Garada K7 Fine Tuning

Or you can call this my Garada obsession...

I know, I need to finish my clear Doublas, but I'm so sick of sanding that it's almost impossible to find the motivation to sand during the evenings and the night.

So I've decide to spend a bit more time on something else for the moment and go back to 3D modeling. Well it's not like starting from scratch here and doing a new character but it's something I wanted to check first.

After I've finish the small version a few month ago, there was something not really accurate in the head and some proportions. Of course the little one is nice but it was a bit like something was missing. Like if I wasn't able to catch his real soul. That's maybe a bit why also I wanted to get back to this model.

Since I have the 3D file for it I wanted to see how much it might cost to do a full size version. I've first think: ok let's scale it and see, but actually it's not that easy. When I've done the scale up of the little model, well the wall thickness of each pieces was around 4mm, that was too much and since a part of the price of a 3D print is based on volume, you can easily guess that it can turn out more expensive if you don't optimize your model.
For that size you need to have 2mm of thickness so for the moment I'm redoing all the interior of each part to get that.
There's also a few things I wanted to optimize based on my first big replica I've done a few years ago. One of the regrets I had for that one was the fact that it was a fix figure, I had to glue the arms and legs. So for this one I would like to be able to move the arms. I don't really care about the legs actually.
And if I go for it, why not try to have a real launching gimmick, so I will be able to put small balls there and launch them. So I'm also working on that and try to find a way to make it work.

Enough talking, here's a few picts.

On those two first it's a side by side of the previous model, the one I've printed in small and the revised version.
Ok it's a bit like the 7 mistake game: Oops our graphic designer have done some mistake, will you be able to find them??


So basically what I've done here, is make the head a tiny bit bigger, raise the eyes levels, make the nose go down more and change his orientation. I've also make the launching gimmick more in the right size, it's still maybe a bit too wide. I've adjust some height like the knees are more high, the legs also. The feet are a bit closer to the original. So a few details that improve the overall feeling I think.
Oh, and I've also add the detail on his mouth as you can see below.


Here's a  pict with all the main parts spread apart to get an idea of how it's put together. The launcher will be connected in the middle so I will be able to pass one part in the front and the other one in the back. Actually I'm really curious to know how the real launcher was put in place on the real Garada. I don't know if the original launcher was also in two parts or if it was in a single part and push inside the vinyl. If anyone have an idea, please don't hesitate to post a reply here.


And here's the final pict with a detail of the connection I'm planning to do on the arms. So it's pretty simple, you will put the arms raised, push them on the connection part and when you turn them down it will be locked. Normally this way you can have some range of movement. I might put a little rubber band around the connection piece to create some friction so that the arm stays in place as I'm afraid that with the weight they will go down all the time and I will end up gluing them :))


Once all this will be finished and looking perfect I will be able to get a real quote to see if going for a full size is an option or not. Price for the Rokuron Q9 full size was kind of heavy but it was almost three years ago. So now 3D print is more popular and it might be more interesting.
Anyway, one thing is sure, the chances to score a real one are so close to zero and the price for the real deal is soooooo high that it's maybe more realistic to dream about this project than the real one.

But you never know, maybe one day for real.

Wednesday, October 26, 2011

Some news

Hello all.

Well, it's been some time now since my last post, but this doesn't mean that nothing is going on.
After my wonderfull holidays, and some really good times, a nice little rush was waiting for me at the office and it was hard to focus on something else.
I still had the time to start some research on several stuff I want to try some day and on some ways to produce some of my stuff.

Nothing really concrete for the moment, but I really would like to try a bit more casting resin and experiment some stuff like complex molds and all.

Now that I have a more precise idea about all that, I've decide to go back on my sanding sessions. Yeah I know, I've already told this lots of times, but I hate sanding.....And right now I'm back on the clear Doublas, and the bad news is that I have to sand both sides of each piece to try to achieve the result I'm looking for. So, long evenings sanding and sanding even more.....

It's really the painfull part of this technic, of course I can ask for pieces that are already sanded but it almost multiply the cost by 3....So even if it's not time saving for me, it's highly cost saving to do it myself.

So, nothing to show really for the moment but you can expect to see some work in progress of this little guy pretty soon.

Once it's complete, I think I will do a break with the sanding and try to do some custom project and avoid 3D printing for a moment, even if I have huge projects for that in the future, it might be good to play with something else for a bit.

Friday, September 9, 2011

It's holiday time for me

Just a quick post.

After a rush on the mini vilains to be ready for the East Coast Chogokin Summit and a HUUUGE rush at work after that, well, I'm finally on holidays for two weeks and I'm planning to do:


Nothing

No jumbo project, no work, no 3D, no sanding, for once I will just enjoy my time and my familly.

But I've lots of things on my mind and on my to do list for when I'm back, so you can expect the final version of the clear Doublas M2, maybe an extra mini Vilains and some nice suprises.

Until then take care.

Mike

Thursday, September 1, 2011

Repro Boxes

A little post with some repro boxes to start this month smoothly.

The good thing about Machinder collecting is that the toys are amazing but so are the boxes. Each one is a piece of art and beeing able to display them with their boxes is just amazing. Well I'm quite lucky to own a few original boxes but having them all boxed is close to impossible since it's hard to find and quite expensive for some pieces.

So, this is something I wanted to finalize for a long long time. A few years ago I was visiting a fellow collector also know as The Most Famous N.... and I was able to take lots of picts of his jumbo boxes. After a few month I had the time to put them together and have files ready for print, some picts were a bit blurry so there's some parts of some boxes that are not perfect but the overall feeling is there and it's nice to at least have that.

For the Ultraman Taro and Leo, the picts used to create the boxes were just picts from another collection, when I've take them I didn't had in mind to do boxes with them since I didn't had the two Ultras back then. After I've finally score both and looking at some of the picts I've take during my visit to another big collector I realized that maybe I can do something with those picts. The quality was pretty bad and I had to use lots of tricks to have a decent file.

The prints came out great and it's probably almost two years that I need to fold them and put them together. And finally I had some time to do them this week so this is one big thing less on my Jumbo To Do List.

The bad news is that the cardoard part is stronger than the original one and I can't put them in my display case, so I will have to find a new way of displaying my big guys, but already have an idea.


So, this is a bit different from the other stuff I usually show here, but hey it's my blog and I can show whatever I want here :))

Sunday, August 28, 2011

Some real and some virtual pictures

Today's post is mainly pictures.

After rushing on the mini machinder to be able to bring them with me last week end to Boston, the return home was quite hard, full rush at work and no real time to do something else.

But when I was at the East Coast Chogoking Summit, I had the huge honnor and pleasure to stay at a friend's house, a fellow collector who as one of the biggest and mind blowing Jumbo Machinder collection. Since I had the Mini Machinder with me it sounded like a good plan to take a few pictures with the real Jumbo Vilains. It's not everyday that you're able to see a real Rokuron Q9, well not everyday for me, there's some lucky guy out there of course.

I first wanted to do quick pict and was looking for a nice background, when my friend just poped out a mini photo studio he use to take some pictures for toys he review. Woaw, that was just too perfect. I've jump on the occasion to take some picts of the mini guys only since I don't have all this at home.

As you might already know, it's almost close to impossible to get a real Garada K7 so the Mini Garada was a bit lonely but still stand out on the picts I think.

Here's a few picts


It's pretty cool to be able to get all those together.


Ok, so now there's a little something I was able to finalize quickly. A few weeks ago I've post an image with lots of Garada. Well, this was done with a work in progress model and with not all the little details. So here's the final version of this, now there's the little rivets, the two greens. It looks a bit better now.


I've see a few people use the previous image as desktop image, feel free to use those like a real Garada K7 fan.


Saturday, August 13, 2011

Mini Garada K7 complete the infernal trio

Yes, finally the 3 mini Machinders are done but this little Garada was hard to finalize.

For the little story, I first send the 3D modeling to Shapeways as I've done the other with them, the resul this time was awfull, don't know why but it seems like the quality control there is really bad, there's probably no quality control.

Anyway, so I had to fight a bit with them for a refund and I've then send the file to Materialise, the guys with who I've done my big projects, they are a bit more expensive but at least they are real pro and they know how to use their printer.

The print came early this week and since then I've spend all my evenings sanding it. On Doublas I had to re-sand it after the first layer of paint as the print layers where still visible. So for Garada I wanted to avoid this and spend enough time on the sanding. It was clean this morning and since I had a full day off, well I decided to paint it. The print layers where still a bit visible even after all this sanding but it was not that bad so I've decide to keep it like this. The first layer turned out great, but then the green was just a mess. I don't know why but I was mixing some colors to get the green but when adding the thinner it started to make some little drop when sprayed. I was thinking that my airbrush was maybe a bit dirty so I've clean it and redo the same mix. But it turned out the same way, again little drops. I've clean everything one more time and this time I've decided to use water instead of the thinner and yes this time it was working.
Since it was a bit painfull with the green, I haven't paint the body with the slightly brighter green, but with the same color to avoid more troubles.

After a few other accident, the Garada was painted and glued. Ok you have to know that I'm doing all those stuff in my basement with a crappy light. And when I went upstairs with this little guy, I've discover that the green, that was looking ok down there, was a bit too funky pop green. Damn, I've build a disco fluo Garada K7. Well it's not that bad but it's slightly off and feel a bit weird. I will have to watch out for this if I do a full size one. I also noticed one thing, the head might be a tiny bit too small when looking at the general proportions.

But at the end I'm quite happy with those three little guys, they look pretty nice together and at least I will be able to display them at home since they don't take much space.

As usual, here's the picts, enjoy!


Next mission: Finish the clear Doublas M2. ARGLLLL even more sanding......:))

Wednesday, August 10, 2011

Mini Garada K7 work in progress

Today, early in the morning I went to pick up my latest 3D print and the third of the mini Machinders serie. A mini replica of the famous and obscure Garada K7. My original plan with those little guys was to do at least those 3 and maybe an extra one but not in the weeks to come.

So here's a few pictures with the raw print before any post process. I guess I will have to spend some evening to sand it, I'm a bit afraid to loose some details as I've been soft in the modeling like the horizontal lines on the body. You barely see them and I hope that after the cleaning and sanding they will still be there. I might have to redo them once the print will be clean.

I've also work a bit on the design of the boxes so here's a few pictures of the mini Garada and the infernal trio with their boxes.


Wednesday, August 3, 2011

Mini Doublas Painted

A good post to start this month.

The mini Doublas is finally painted, after long long evenings of sanding, airbrush and paintbrush, this little guy is finish. You can see on the picts that I'm probably not as good for details as I used to be in the past. Everything is not perfect, but hey, at one point the originals are not perfect either, so it's more or less consistent with the real one.

Now I have to finalize the boxes for the two mini Machinders and after some big mess from Shapeways regarding the print of little Garada, I had to order a new print in a more reliable company like Materialise. I will post picts of this later but it's interesting to see that everything is not going smoothly all the time.

Anyway, here's a few picts of the little Doublas M2


Tuesday, July 19, 2011

Clear Doublas is for real

After playing with some rendering test with the model of Doublas and seeing how a clear version could look, well, I've decided to try to do it for real.
It was hard to find a way of doing it with a great result at the end, and I came across a printable transparent resin. The company who offer that is Materialise, the same company I've already work with on the big Q9 and the Daltanious head, but didn't know they had such a material.

I've decide to give it a try even if it cost quite a lot, the idea of this clear Doublas with paper inserts is too funky.

Just picked the print today and as you can see it's not crystal clear yet as I need to clean it myself, sand it, polish it and varnish it. I was able to reduce the price by doing the post process myself but it's still hard for the wallet.
Anyway, hope the end result will be great.

Here's a few crappy picts done with my cell phone.


You can check the size on this last picture, he's 25cm high, so a bit bigger than the other print as I need to be able to polish the inner parts as well, and damn it has to be bigger.

More about it soon.

Sunday, July 17, 2011

Garada K7 Final Modeling

After spending some time discovering the pleasure of wet sanding this week, it was time to finalize the modeling of Garada K7. Well, at least the main shape as now I have to do the whole technical part as usual to make it hollow and ready for print.

Here's some images of the final modeling:


Hey but seriously, wet sanding changed my life. I was just writing the other day that I should spend more time on the sanding of my models, but with this technic, it's way more fast and accurate. I learn new stuff every day doing those little guys.

Friday, July 15, 2011

Mini Machinders update.

Here's a little update on the Mini Machinders.

The good thing with those projects is that it really involve a lot of different aspects, from 3D modeling to print, sanding and cleaning and finaly painting. I just realize that this combine almost all my passions together. Well, except maybe the sanding which is the boring part.

And you can see on the pict below that I maybe need to spend more time on that part as you can still see the printing layers on some parts of the Q9. This guy is almost finish and it was quite fun as I was doing all the paint brush parts tonight, I really had the impression that I was doing the same thing as on the bug one I did two years ago, same tricky parts but smaller.

One thing is sure, I'm getting older and my eyes are not as accurate as before when I was painting Donjons & Dragons figures.

I also just receive today the 3D print of Doublas M2, and he's looking pretty cool. On that one I've try to put the smallest wall thickness possible for this kind of print, something like 1mm and on this size it's maybe too thin. The model feels far more fragile than the Q9, so it's cheaper as price is calculated regarding the volume but it's a bit risky.

So, here's a pict with those two big guys, well not so big, but cool anyway.


And here's another one where you can see a bit the table with a plastic glass in the back to have an idea of size


Lots of stuff are happening lately, as each one is at a different stage but things are moving and it's good.

Oh, and I already posted this image on TBDX but it's good to have everything together at the same place, so here's an image of lots of Garadas,  just wanted to play with it a bit and make an image of something you can only dream of, or use as a wallpaper like a good friend :))


Wednesday, July 13, 2011

Garada K7 Work in progress Part 2

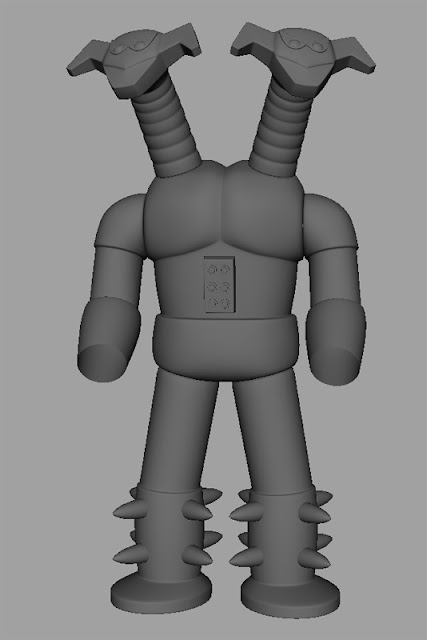
Here's a revised version of the modeling. The head was improved and the sickels are more define right now. There's still the chest piece that I need to redo from scratch for some technical reason.

I've always wanted to have a "virtual" Garada to do tons of render of it with lots of them in the frame. But for the moment, it's just a render test to see how the model look with some colors.
Well, I could have spend more time on the textures and add all the little details like the rivets on each piece but since it's just work in progress I wanted to get a quick result just to have an idea.


Looks like the arms could be a bit more wide, on the one on the left they seem too thin. I will need to check this next time. And I should also remove Grendizer from the image of the test scene. Or maybe not :))

Tuesday, July 12, 2011

Time for a sneak preview

Ok, so today I'm posting some work in progress on the last little vilain I've decide to make.
Doublas M2, Rokuron Q9 and Garada K7 are for me the most amazing vilains and probably most amazing toys produced. When I had the idea to print my Q9 in a small size, the concept of having the two other also was really turning into my head.

The paint on the Q9 is almost finish, I try to alternate some paint sessions with some 3D modeling. So I will probably post something with it soon.
The small Doublas is on his way and I can't wait to see how he will look.
And the modeling of Garada is on the right tracks I think. There's still a lot to do but the basics are there. Still need to finalize a lot of parts, do the line on his body, maybe reduce the one on the pelvis. The sickles are rough for the moment. But overall, I quite like the look for now.

Can't wait to have all this infernal trio printed and painted.


Just a little edit after a good night of sleep on this work in progress. After looking at a lot of pict of real Garada, well I'm still far for the face I think. There's something really strange in the original and I would like to capture that. It's somthing with proportions, the size of the neck compare to the face, the face looks a bit more flat. Anyway, still a few evening to work on this guy before he's perfect and ready for print.

Oh and while I'm at it, here's a little something for fun: I wanted to make a box for the small Q9 and here's the first idea based on the boxes of the first Vilains release. I know that Rokuron box is not like that but since I don't have all the other yet and I'm not planning on doing the other from the second release. I was thinking that a version like that could be cool too.

And the small detail, it's not written  Jumbo Machinder in Japanse but Tchibi Machinder (if I remember well as I'm far from able to speak or read Japanese) It's supposed to say small but in a cute way.

Monday, June 27, 2011

Clear Doublas virtual concept

The good thing with 3D is that once you have your model and a few textures, you can decline it and just do what's on you mind. It's a bit the case here as I've push my modeling quite far to get a decent and optimize 3D print of Doublas in small versions. With the influence of a post on TBDX BBS with clear toys, and also with the influence of the Incubot Sofubi, I wanted to try a little render test of a clear Doublas and a version with paper inserts. And also because I'm waiting my 3D print for a long long time and there's huge amount of delays in the orders, I had a bit of time to try it.

The fact that the 3D model is not just the exterior surfaces but there's all the details of the inner surfaces and the connections parts, make this super interesting with a clear render as this create interesting refractions.

Could be fun to produce that little guy one day, well after all the stuff I have to do before, like painting the Q9 for example and doing some new characters also. Good stuff with that kind of versions of Doublas, no paint is required :))

So here's the clear version of it.


 And here's the version with paper inserts.

Tuesday, June 21, 2011

18cm Q9 ready for paint

Just wanted to give a little update on one of the projects as it seems that I've been super busy with 3D modeling lately on other stuff like the Doublas and kept the other one on the side. I've order a few 3D print and it always take some days before they arrive, so it's time to focus on some sanding, cleaning and painting.

The 18cm version  (7.08 inches) of little Q9 is now ready for paint. I'm quite anxious as I'm going to try the airbrush on that one, but I will probably need to do some tests just to be sure not to ruin everything now.

So here's a few picts of it before this step.


Wednesday, June 15, 2011

Mini Q9 Not for sale anymore

Just a quick news. I've remove the Q9 from the Shapeways store.
My sample was in a box for two weeks and when I've pick it up this week end, some parts were super yellow.
So I've decide to remove it as  I don't want to have people disappointed with that. If I buy something I want it to be cool and durable, so I can't sell something that doesn't go in that way.

The good news is that I'm working on something that might solve that and even be more interesting. Well, I hope so :))

Saturday, June 4, 2011

Quick Update

Super quick update. Here's the model with the hand, only a few hours to go for the final technical part (the part I hate the most) and it's going to be ready for 3D print.


There's maybe a few things that need to be improved on the hands. But the overall feeling is there.

Friday, June 3, 2011

Coming Soon...

Hello all.

Ok, here's a little sneak peak of what's coming next. For the little story, in my "free time" planning I wanted to focus on the painting of the Q9 I've printed a few weeks ago, and then start the modeling of the Jaguar leg. But the last print I've done was so amazing in quality and detail, and since it's a temporary offer as the print technic might not be available for some time, I've decide to rush on something else I wanted to do later after all the other stuff.

Well I guess you will recognize this famous character. The idea is to print it also in two size, 18 and 10 cm so that both the little Q9 will not be alone to play.

As you can see it's missing the hands for the moment, it's one of the tricky parts to model and I hope to have some time this week end to finalize the modeling as I also need to finalize the overall technical parts like connecting joints and all that.

Can't wait to get see this guy printed with the semi- transparent look.
But I already wanted to share this with you.


Thursday, May 26, 2011

Mini Q9 available for purchase

Hello everybody.

On the previous post I was showing you a test print done with the new printer at Shapeways.
The result is really great and since it doesn't require a lot of post process I've decide to make it available for purchase with their "shop" system.
It will only require glue and assembly and you can decide to paint it or not, it's up to you. On my sample there was still some support material stuck in the tiny hollowed parts but the overall feeling is nice. It's visible on the picture on the previous post.

So if you ever feel to buy one of those little guy, don't hesitate to go here:

http://www.shapeways.com/shops/freetimetoys

Please, watch out as all parts are separate for order and you will have to order two HeadStraight to be sure to have a complete model. At the end you need to have 10 pieces in your shopping cart.
This model is pretty small and is around 10 centimeter tall when assembled so it's about 3.93 inches height.
I know the price might look a lot for such a little guy but for the moment 3D prints are still expensive and the specific material used to do it is expensive too.

Watch out also as the material I've select for you and which allows a great finish is a temporary offer from shapeways, still a few weeks left. They might continue working with it and it's really something I hope as it's the first time I get such a high quality with 3D print.

Of course, you don't have to order all the pieces, but there's a limit of 25$ I think. So you can for example order only the upper parts, or only with the middle head. It's up to you.

Hope you will enjoy this little guy, and I hope to be able to do other characters in the future

Monday, May 23, 2011

Mini Q9

A quick update on a current project: The mini Q9
One of the company I work with for the 3D print had a new printer for test, with a better quality and level of details so I wanted to do a quick test and decided to print the little Q9, the 10 cm high version.
The result is impressive and almost doesn't require post process. It's also funny because the material is semi transparent and I really dig the look of it. I will probably order another one for painting and keep that one like that. It could be even more transparent but the part are too small and there's still support material inside the small part like the arms and the heads. I will maybe try to get rid of it and have a more clear look.

Anyway, it's a good experience, it's a bit more expensive but I was able to make that one hollow as the properties of the material allow me to make thin surface. So in a way, even if the price per cubic cm is more expensive the price was cheaper than the previous one I made. I'm almost tempted to make it available for sale for a few weeks. But I'm not sure yet.

Here's a pict of this tiny guy.


The semi transparent look makes it hard to see the details, especially on the heads, I will try to make other pictures later when I have some time.

Friday, April 22, 2011

What I have on my mind

A few days ago there was an auction for an uncomplete toy.
To be more precise it was this toy:


The Hasami Jaguar, one of Kamen Rider's vilains and one of the ten Popy vilains.

As you can see he's missing a leg and maybe you saw it a few times for sale as it seems that nobody wanted that uni legged toy. I was looking at this poor guy and something came into my mind. Something weird, it was a clear vision.

So today I present you this vision for your very own pleasure. Because it's not always about toys but also just doing fun and stupid stuff:


Well I can finish by saying that I've win the auction with not much fight going on and this project comes on my 'to do list' of things I want to do, but it can be a pretty nice challenge and I can't wait to start working on it.
There's going to be a few post I thing about that big guy.

Wednesday, April 13, 2011

freetimetoys.com

Hello everybody.
No images today, but a funny little story. When I've launch this blog I wanted first to create a website to show some of my toy projects. The name came quickly but after looking for the .com, the site was already taken and was for some kind of adult site, you see what I mean....So I've decide to do it with a blog here.

But it turned out that the site shuted down and the name was available again. I had to bid on an auction to get it. Funny as I get most of my toys on auctions, and I had to do the same for the website.
So now I've secure the site and redirected it here. Maybe one day there's going to be a real website, but that's for a future somewhere.

Tuesday, March 29, 2011

Q9 Familly

Why did I show you my first project with the Rokuron Q9?. Well simply because I was working on a smaller version of it. If you don't have room to collect Jumbo Machinder, you can collect this smaller version or even the tiny version. The tiny one was really just for fun but it turned out also great.
The idea behind this is to try to reduce the cost and be able to produce print a few stuff. 3D print is still expensive and printing a full sized Machinder is hard for the wallet. And it's also pretty funny to see a Q9 that size :))
Here's a bad pict of them, more to come once they will be painted.

Light set up test

On the last post with the Double Spazer, I've manage to do a little light set up that worked more or less ok with the Grendizer on the picture.
I've decide to do a little render test of my Boba Fett in the same set up and see how it goes. At the end, the light seems to match but I have a lot of work to do to improve the shading. Plastics doesn't react like the original one. But this could, clearly be a good test scene to set up things later, and it's fun to see them next to a real Machinder.


Sunday, March 27, 2011

Double Spazer Machinderized

Here's a little update of this project. I had interesting feedback from some friends like it was not enough "Machinder" style. It's true that I've had the little SOC double spazer next to me to check for the modeling, so maybe it was a little bit too close to the SOC at the end.

So I've change a bit the texture to make it look more like the Spazer little brother. It's maybe even not enough but it gives a better feeling I think.

Here it is: